


3 minutes to automatically sign your commits with a verified signature in VS Code.
Prerequisites
Process
Generate key
- Open Git Bash and input
gpg --full-generate-key. - Select
(1) RSA and RSA (default). - Input
4096. - Input your chosen expiration or
0to never expire. - Input your: name, email and comment (can be left blank).
- Input
Oto confirm. - Input your passphrase (don't forget it!).
Export key
- Open Git Bash and input
gpg --list-signatures. - Copy the 16-digit key ID that follows "sig".
- Input
gpg --armor --export XXXXXXXXXXXXXXXX, replacing theX's with your key ID. Keep your key ID at hand as it will be needed again. - Copy the entire key block, including the beginning and end text.
- Visit your GitHub keys page and select "New GPG key".
- Paste in the key block then "Add GPG key".
Set key
- Open your Terminal (VS Code's integrated terminal will also do).
- Input
git config --global user.signingkey XXXXXXXXXXXXXXXX, replacing theX's with your key ID. - Input
git config --global commit.gpgsign true. For your local repository, you can drop the--globalflag. - Within your repository, input
git config --listand ensure theuser.nameanduser.emailare consistent with the generated key. - In VS Code's Settings (UI), tick the "Git: Enable Commit Signing" checkbox or simply add
"git.enableCommitSigning": true,to the Settings (JSON). - Your passphrase will be required for the first Git sync.
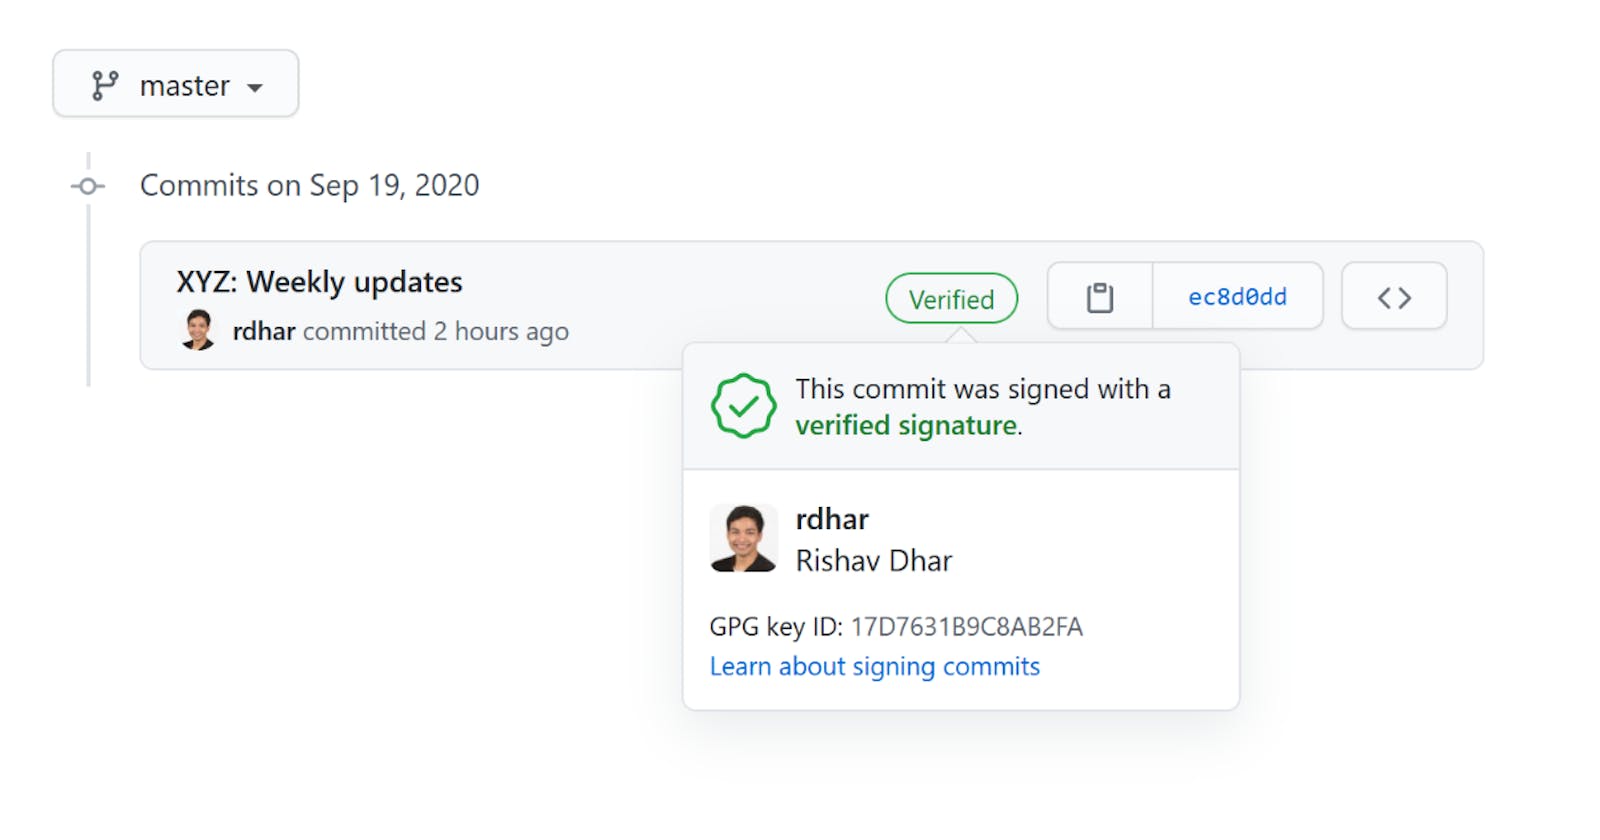
That's all you need to get the lovely green "Verified" badge next to your commits. Thanks for your time!
Undo
Perhaps there was a mistake and you want to reset. Or you want to keep your email address private and redo using your GitHub-provided noreply one instead.
- Open Git Bash and input
gpg --list-signatures. - Copy the 16-digit key ID that follows "sig", which you want to remove.
- Input
gpg --delete-secret-key XXXXXXXXXXXXXXXX, replacing theX's with your key ID. - Input
gpg --delete-key XXXXXXXXXXXXXXXX, replacing theX's with your key ID.
Now that the public and private keys have been removed, you can restart the process with newly-generated keys.
Credits
- Preston, M. (2019, Sep 18). Signed GitHub commits and VSCode. Retrieved from mwpreston dot net.
- Müller, A. (2019, Sep 18). Signed Git commits in VS Code. Retrieved from Medium.
- Chapagain, M. (2015, Oct 8). GPG: Remove keys from your public keyring. Retrieved from Mukesh Chapagain Blog.
Background reading
- GPG is short for GnuPG, which is short for GNU Privacy Guard: a free implementation of the OpenPGP standards.
- Signing individual commits was introduced in 2016 from Git v1.7.9 and above.